10.29.2013

homemade vapor rub...without the bad stuff

My uncle is a physician and my number one go-to for medical advice (or first-time mom freak-outs, you choose). One of the earliest pieces of advice I remember him teaching me was to always say no to the Vicks Vapor Rub. It has a lot of harmful ingredients -- including petroleum and turpentine oil (yuck!) -- that don't really belong rubbed into anyone's skin. Not to mention the cooling sensation from the menthol simply tricks your body into thinking you can breathe better -- it doesn't actually make you breathe better. On the contrary, recent studies have shown that that it's ingredients can actually serve as irritants to trigger more mucus and congestion in small children, which can cause severe upper respiratory problems. And, well, we've got enough upper respiratory problems to last us ten lifetimes over around here.

We've been experiencing some chilly (for us) temperatures here in South Florida and this gorgeous, chilly breeze has been one heck of an invitation to spend a lot more time outside. But with the thrill of not feeling like your flesh is melting clear off comes some stuffiness and breathing issues for Ethan. With each sad little cough, I'm remembering why I was so grateful for last year's cold front to just go away already. I wanted something to actually help keep his airways clear without having to load up on medications or potentially harmful body rubs so I scoured the internet and made my own version of vapor rub. Without any of that yucky stuff -- always a plus.

First, you need jars. I always have some sterilized baby food jars on hand for various craft projects so that came in handy. Make sure you have a jar with a lid that seals on tightly and properly. As for the ingredients, you need:

1/4c olive oil
4 tablespoons coconut oil
4 tablespoons shredded or chopped up beeswax (Whole Foods had 100% beeswax unscented taper candles for $6 -- this was the budget-friendly equivalent of buying pre-chopped or shredded beeswax pellets. It was pretty easy to just grate up in a few seconds with a hand grater!)
15 drops peppermint essential oil
35 drops eucalyptus essential oil
15 drops rosemary essential oil
5 drops lavender essential oil

I used each of these oils for a reason. Eucalyptus has antiviral properties and decongestant. Peppermint oil helps to open nasal passages. For adults, you could use more peppermint than I did, but since this was primarily for Ethan, I used a little less. (Some people recommend against use of peppermint oil on infants so always consult your doctor first!) Rosemary is also an antiseptic that is recommended for kids two and over helps to open nasal passages. I also threw in a little lavender because it's an antihistamine and also for it's relaxing properties (when he can't breathe, Ethan has even more trouble sleeping than usual!).

Experiment with your own ratio of wax to oil. I kept mine pretty diluted with oil since it was primarily for Ethan, but you could always lessen the amount of oil used. Ours still hardened nicely but was still just mushy enough to rub in easily without caking on and driving Ethan nuts.

Anyway, to make, combine your oils and beeswax in a glass.

Bring water in a small saucepan to boil and then remove from heat and place glass inside. After about 8-10 minutes and some stirring, the wax will melt and the oils will combine.

Add in your essential oils and stir. Immediately pour into glass jars and seal lids tightly.

After about 30 or so minutes, your vapor rub will set.

10.28.2013

joovy foocot child cot review

Last February I did a review for Joovy's Moon Room which has been a lifesaver when we travel. Though it paints me to admit, my baby is growing up and we were a little stuck when it came to our upcoming travel plans this holiday season. With Ethan no longer sleeping in a crib and being large (read: gigantic -- what happened to my itty-bitty snuggly baby?!) enough to hoist himself out of any relative confinement, I was a little nervous. Ethan knows he sleeps in a bed, but toddler beds aren't exactly feasible for travel. What do you do? Take them apart and reassemble them at each destination? With three different overnight stops in November alone, this seemed a little daunting. Ready to save the day like always, Joovy stepped in with an awesome solution: the Joovy Foocot.

When the Foocot arrived, I had some concerns. How hard was the assembly (see also: I won't always be traveling with my husband and will have to survive on my less-than-stellar handymom abilities)? Would it be comfortable? Was it too high and would he roll off and hurt himself in the middle of the night? All of these concerns dissipated from the moment we removed the Foocot from the packaging. The Foocot is actually a really sturdy, well-made, comfortable bed for toddlers and children. Using their sheer brilliance, Joovy has figured out a way to make it compact and perfect for travel without compromising on comfort. Or, like I was also concerned about, ease of assembly.

...Mostly because there is no assembly. You just pop it open and suddenly it's a pretty awesomely sized bed! The Footcot weighs less than seven pounds. Assembled, it's an impressive 9.5" H x 25" W x 48" D. Unlike my original concerns, it's not at all high enough for kids to roll off and get hurt. And to my added surprise, it's actually really wide -- wide enough for Ethan to lay on comfortably with his lifesize plush alligator (with room to spare!).

My husband and I were extremely impressed with the construction of the Foocot. Unlike traditional pack and plays, your child does not lay across the bars. The bars don't come in contact with the base of the bed due to the Foocot's unique and practical design. The way the fabric is sewn together in a cross pattern across the top provides great support for little ones and their backs!

The base of the bed itself is made from top-grade 600D nylon fabric. Even with Ethan crawling across the top (and this kid is no joke at just shy of 40 pounds), the nylon is extremely supportive and doesn't cave under his weight. Because of the strength of this fabric, the Footcot is great for kids up to 75 pounds. The Foocot also comes with a custom fitted sheet made out of 100% cotton (extra fitted sheets can be purchased separately). For $39.99, you can also purchase a quilted mattress pad specifically made for the Foocot. Even without the mattress pad, the Foocot is extremely comfortable.

The Footcot also has an attached storage pouch which is perfect for overnight supplies: toothbrushes, a flashlight, a special stuffed animal. We chose to keep our fitted sheet safe and stored in the pocket.

When morning comes and you're ready to pack up and head out, the Foocot takes about ten seconds to close back up and put away.

Where To Buy: The Joovy Foocot comes in five different color options and is sold for $69.99 on Joovy's website.

Stay Connected With Joovy on Twitter and Facebook for more exciting news and special updates!

Still so proud to be a

it's the great bubblewrap pumpkin, ethan nicholas

Fingerpainting on bubblewrap is one of our most favorite sensory-rich art projects to do around here. With Halloween just around the corner (and my kid about to implode with excitement!), I wanted to find a way to incorporate the fun of bubblewrap painting with Halloween.

Behold, the Great Bubblewrap Pumpkin.

The prep was fairly simple. I had a small piece of bubblewrap left and cut out an orange circle from construction paper in a coordinating size. (This also would have been really fun to make really big if I had enough bubblewrap!) I wrapped the excess bubblewrap around the orange pumpkin and taped it to the back. The bubblewrap was just ever so slightly bigger than the circle to make this possible. I taped on a stem, put some fingerpaint in some cups and let Ethan feast his eyes on this glorious activity that incorporates all of his favorite things. He was so excited!

Unlike most of our bubblewrap paintings, this one was the perfect size to hang up on the wall, which he couldn't wait to do.

(Above is the "say cheese" face. Apparently "in pain" is the new smile. Noted for our upcoming family portraits -- keep the "cheese" out of it.)

10.27.2013

tot school - letter p - 28 months

Our letter P "week" became two weeks long. Just like how over the summer it got to be too much swapping curriculum weekly due to an overload of outside of the home activities, I'm thinking we'll have to follow suit through the holidays as well. Ethan's had some kind of Halloween party almost every single day and with the weather finally so gorgeous out, we've been spending a lot more time outside. The two week thing is working best for us again right now and since we'll be doing a lot of traveling in November, it just makes the most sense right now. The fun thing is, we are a few weeks into our group tot school co-op and it's going better. The kids minus Ethan are adjusting well to some semblance of routine. I feel like it just keeps getting better every week. My hardest thing is controlling Ethan who is just so excited his friends are over that he runs around like a maniac trying to shift the focus onto himself and whatever mess he's making for the sake of laughs, but I know that'll come eventually. And he really loves having his buddies over to play with. There is definite improvement as each week goes on.

This week we had some fun letter P tot trays set up:

POTATO SIZE MATCHING

This one was a pretty big hit. Worth all of the looks I got at the grocery store trying to size up potatoes. The tray had corresponding construction paper squares glued on so the kids could match the sizes from big to small. Or they could flip the tray and do small to big. Or they could take the potatoes off the tray and onto their workspace and arrange them on their own. There were a lot of neat ways to do this tray! Towards the end, Ethan loved arranging them himself without the aid of the construction paper.
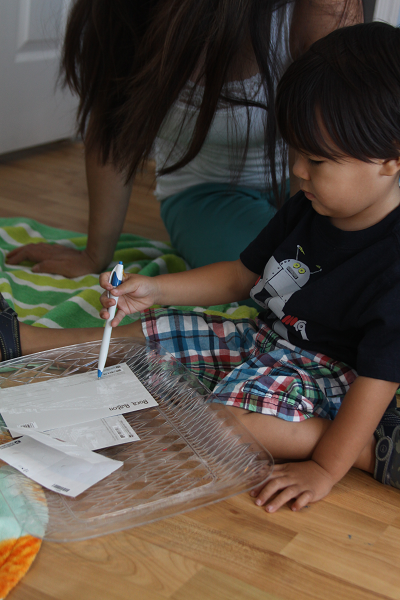
POSTCARDS

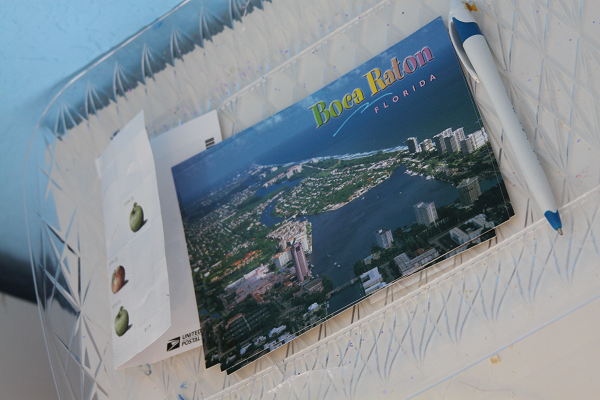
I set out some postcards, pens and postage. The kids got to write out a message and stick on the stamp. Ethan wrote out a couple of these and I just wrote a tiny disclaimer that we were learning about postcards in tot school before sending them off to various relatives and friends. This one wasn't as big of a hit. I don't think everyone used this one in our co-op, either.

LETTER P BUTTON ACTIVITY

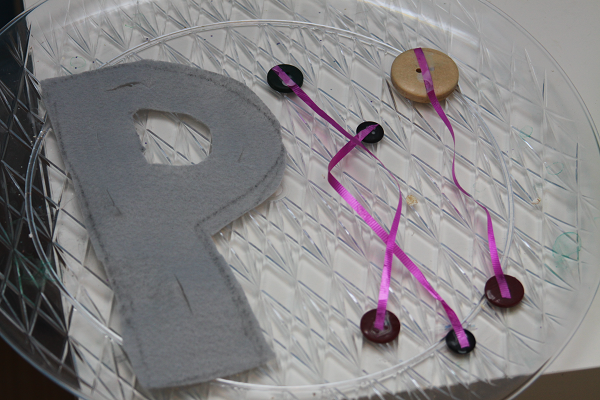
Totally the least used tray this week. I had some leftover felt and some leftover buttons, so I thought this might be fun. Toddlers always manage to prove me wrong! The point of this tray was to work on buttoning skills in the felt P.

PIRATE TREASURE MAP

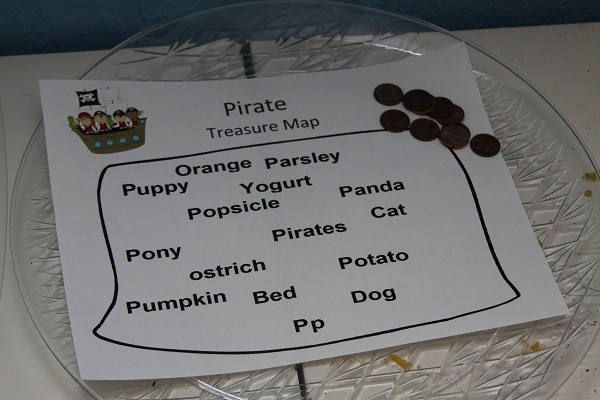
This one was a hit. I made a pirate's treasure map filled with different words that begin with P and also some that don't. I also put some pennies on the tray and the point was to place the pennies on the words that start with P. I'm not sure Ethan grasped the concept of this tray but it excited him anytime he saw it. He just liked spreading the pennies around and "makin' treasure like pirates!"

PIZZA TRAY

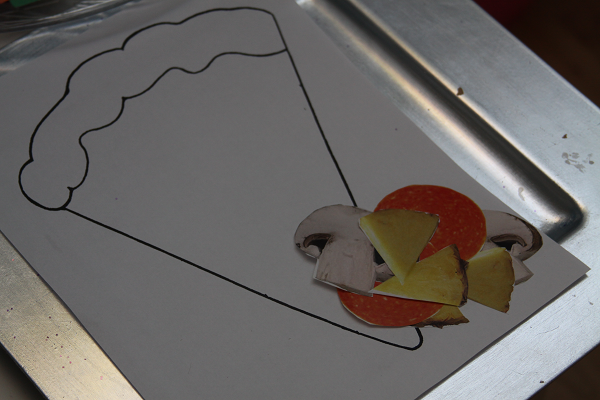
This tray was just for fun so the kids could use their imagination and put together their ultimate pizza. I hadn't even intended to use P items as the toppings (pepperoni and pineapple) so when I threw in mushrooms (because Ethan likes them), I totally threw off the P theme. Oh, well! Ethan had a blast making his own pizzas and it was cool to watch him do, because he totally organized his toppings in some neat ways. Sometimes he did them in a pattern (pepperoni, mushroom, pineapple and repeat) and other times he layered them in a row.

POPSICLE SHAPE SORTING

This was Ethan's favorite tray this week. Each popsicle had a shape pasted onto it and there was a set of corresponding shapes on the tray as well. The kids enjoyed matching the shapes together. Ethan still has a little bit of difficulty with square versus rectangle in terms of verbally identifying, but this tray was great practice and a lot of fun!

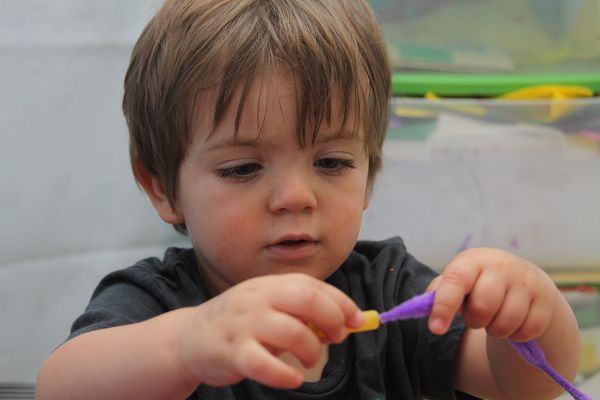
LETTER P SENSORY BIN

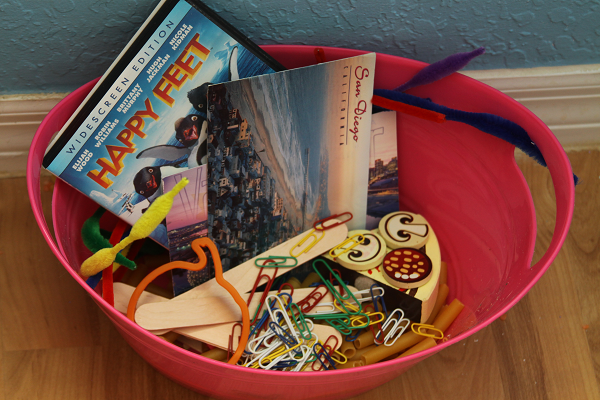
The sensory bin was a huge hit this week! I included a lot of fun P items (penguins, pumpkins) as well as a lot of open-ended play items (paper clips, pasta, pipecleaners). Ethan had a lot of fun building and constructing by linking the paper clips or pushing the pasta onto the pipecleaners.

LETTER P FELT BOARD

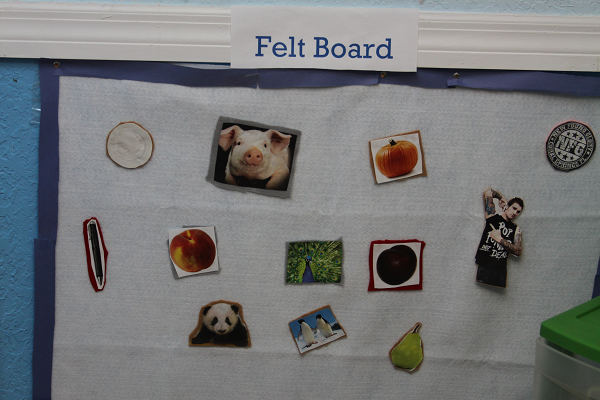
As usual, Ethan was totally "meh" about the felt board. As indifferent as he is to it, he refuses to let me take Jordan (from New Found Glory) off the board. He's been hanging out since our toddler geography unit. None of the kids seem all too interested in the felt wall, I have to say.
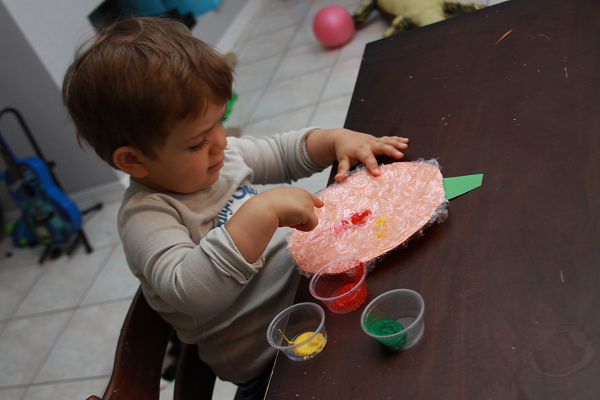
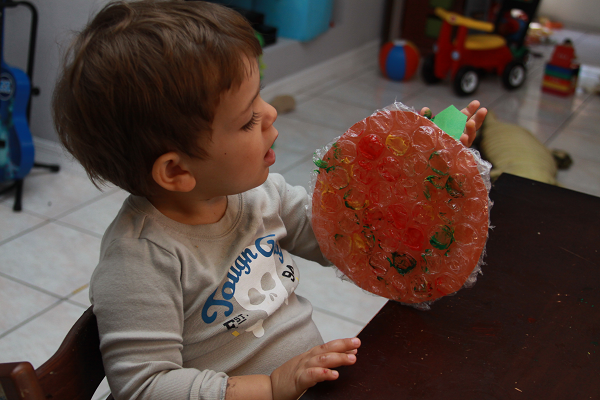
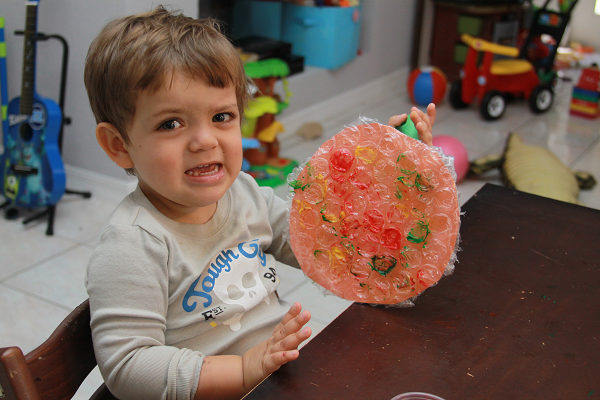
PAPER PEAR

As a fun craft, I cut a pear out of card stock. I gave Ethan some glue and some shredded green construction paper. He got to go to town gluing the scraps of paper onto the pear until it was covered. We glued on a brown stem and he was super proud of the outcome! (He's in the cheesy fake smile stage and I am loving it!)

PITA POCKETS

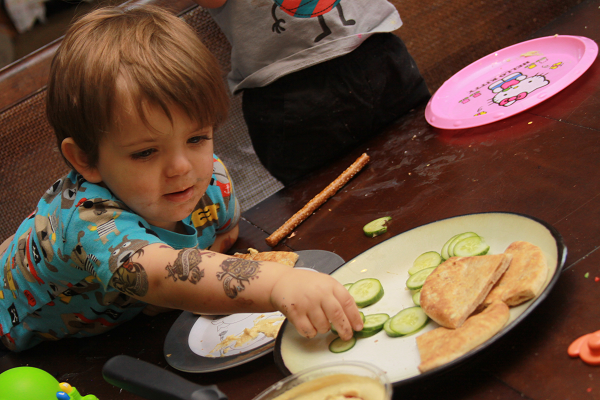
In our tot school co-op, we always try to do a themed lunch or snack. Heather from And Then My Name Was Mama had the great idea to do pita pockets for P week! The kids loved stuffing their pita pockets with hummus -- and cucumbers, too!
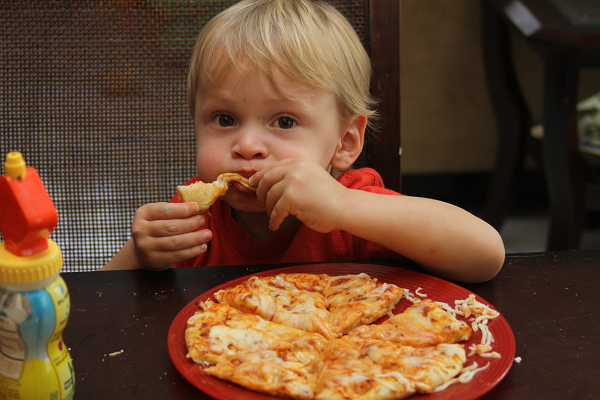
PIZZA PARTY

We also set out sauce, cheese and individual crusts and let the kids go to town making their own pizzas! It was super cute to watch them, especially as they shoveled handfuls of cheese in their mouths between spreading the sauce!

PUDDING CENTER

For the second week of P week, I set up a pudding making station. We did chia pudding because it's the easiest to whip up and then put away overnight. I got little baby food jars, sterilized them and set them out on individual placemats with pre-measured little containers of the ingredients. The ingredients are actually in jello shot containers which I didn't even know was a thing (goes to show how "cool" I've always been) but I felt totally silly buying them along with some baby food jars, but it worked! There were two little containers of milk per child (I usually use almond milk, but one of the kiddos has a nut allergy -- any milk works!), one of chia seeds, one with honey and one with some chocolate chips. The kids just throw all of the ingredients in the jar, close it, shake it, and set it in the 'fridge overnight. The end result is something like tapioca pudding with some yummy chocolate chips added, too.

PAINTING PICTURE FRAMES

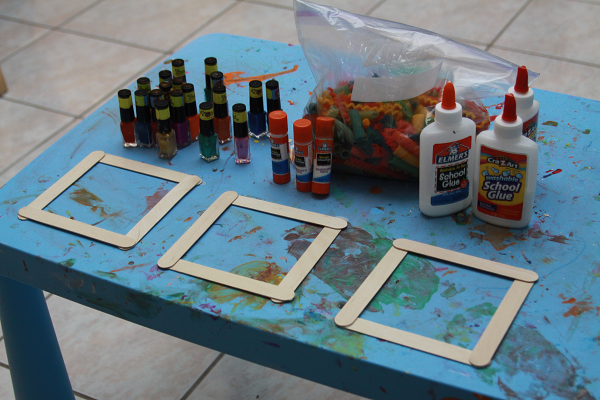
I set out some popsicle stick picture frames, paint and dyed pasta that one of our tot school co-op mommies made and the kids were able to decorate their frames as they pleased. This somehow turned into mass chaos around the time Ethan decided to act like he's never painted before in his life because it made his friends laugh, but they still got some cute picture frames in the end!
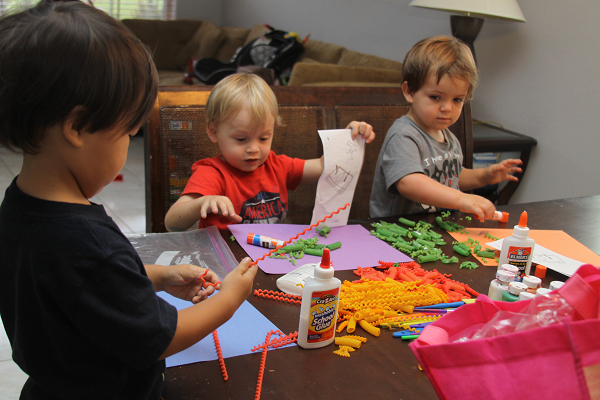
PASTA FUN

One of our tot school co-op mommies dyed the most beautiful, awesome pasta I've ever seen (so many shapes and colors!) and the first week of our P unit, the kids got to go nuts gluing and making beautiful pasta creations!

PUMPKIN PAINTING

With Halloween around the corner, the kids had a blast painting their pumpkins!

THE SPOOKY SPIDER

I know, neither "spooky" nor "spider" begin with P, but I had to share this craft with you. It was super creative fine motor fun and the kids had a blast making their spiders! Heather was the brainchild of this one -- go check out the tutorial!

LINKING UP WITH:

Tot School Montessori MondayI Can Teach My Child

No Time For Flash CardsFor the Kids Friday


Related Posts Plugin for WordPress, Blogger...